
Before I begin I want to apologise for the lack of good quality before pics. When we first had our home I had no intention of sharing decor ideas on Instagram, let alone having an interiors blog, and so a quick snap in a dark artificially lit room would suffice. How things have changed! But I wanted to share with you the first space we renovated; our kitchen-diner.
We didn’t have enough budget left to rip out the kitchen and start again, and yet what was there very much felt like we were living in someone else’s home and it was in need of an update.
Cue blurry before pics…


I envisioned a bright coherent space with a white kitchen and a contrasting floor. As we couldn’t start again the existing units had to have a makeover, but we were able to add some features that prevented it looking too DIY.
The existing floor and wall tiles were removed, the artex ceiling plastered, and spots and under cabinet lighting installed.


Are you ready for the afters….?

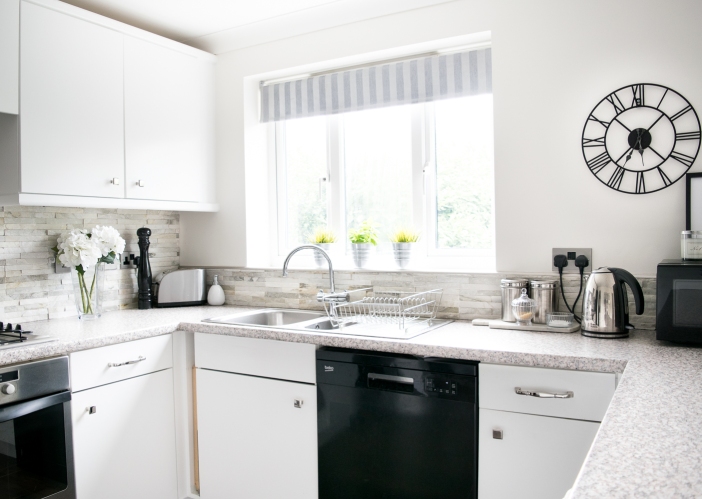

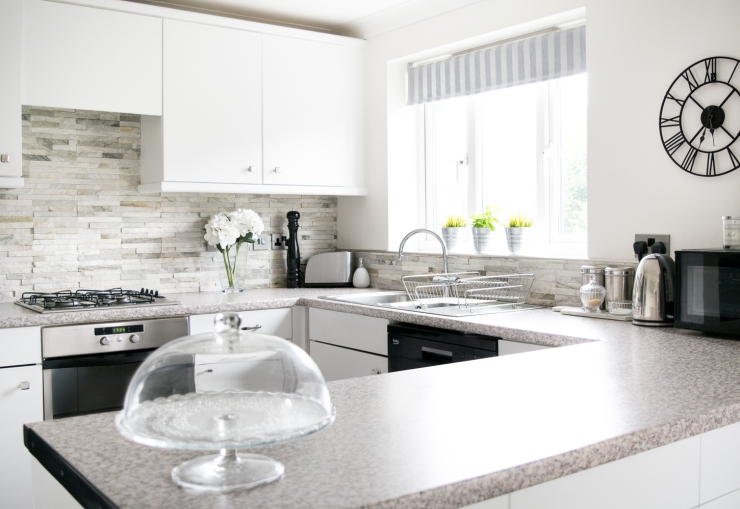
Everything had a lick of white paint, the ceilings in brilliant white and the walls a slightly softer off white. We removed all cupboard doors and the units were all thoroughly scrubbed with sugar soap, lightly sanded down and two coats of undercoat primer applied with a small roller. This really was a labour of love but if you’re going to paint units preparation is key for a good quality finish. Two finishing coats of paint were then applied, we used Dulux Satinwood in shade White Cotton. Three years on, yes, there are a few small chips in the paintwork as it is a working kitchen, but they are not noticeable and it’s holding out well. We also added new chrome draw pulls for an updated look.

The original kitchen and dining area had split flooring making it feel like 2 separate rooms. To create a visually coherent space that would flow we laid dark oak laminate throughout, creating a strong contrast to the otherwise all white scheme.

I wanted something that would add texture to our white kitchen and so we opted for these beautiful natural ledge stone tiles. With all the DIY going on this was more of a splurge but it gave our kitchen a more polished feel and became a bit of a centrepiece. Mr F did the tiling, and once in place you coat them with a clear stain block. This stops the tiles being porous and makes them wipeable and easy to clean even though they have a matt surface. The under cabinet lighting highlights their tactile texture and cooking in here at night with the lights dimmed really feels a bit like an Italian restaurant which I love.
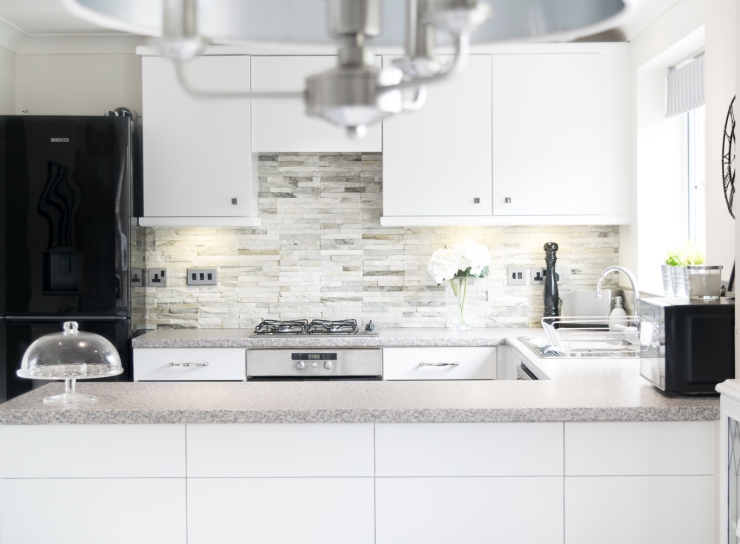
The existing worktops had to stay for the time being, it’s something we said we would change at a later date, but something we’re yet to do!
What do you think? It goes to show that even with a small budget there are things that can be done to make drastic improvements. It may not be the long term goal but a big step in the right direction.
Any questions feel free to contact me here or over on my Instagram, I’d love to hear from you 🙂
Rebecca x

Absolutely beautiful inspiring transformation. So much fresher, brighter, stylish! You’ve done an amazing job. Thanks for sharing x
LikeLike
Thank you so much, it goes to show what can be done with a bit of determination 🙂 x
LikeLike